
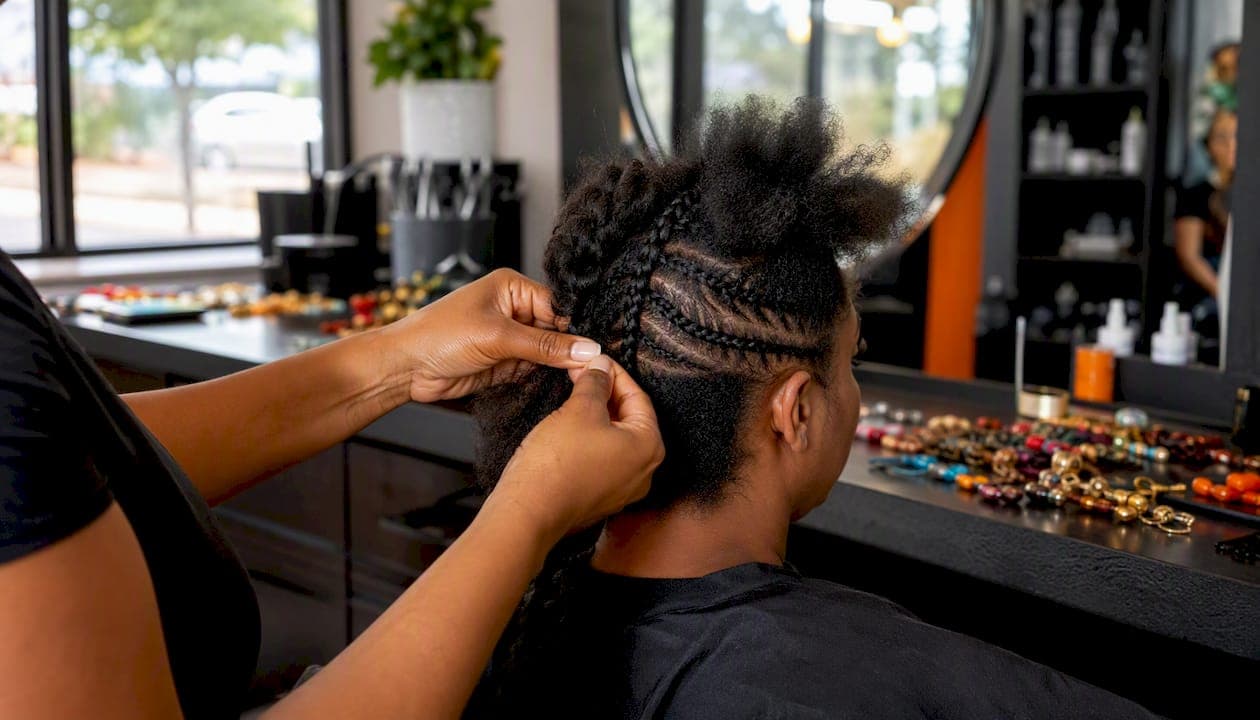
The most chosen cornrow styles for women are straight-back cornrows, feed-in/Ghana braids, knotless cornrows, stitch/zigzag braids, Fulani braids, jumbo/chunky cornrows, boho/bohemian cornrows, and braided ponytail/updo styles. Each one serves a different texture, face shape, and lifestyle. Here's the fast version:
- Straight-back cornrows — clean, parallel rows braided toward the nape; flatters most face shapes; low maintenance.
- Feed-in/Ghana braids — extensions added gradually for a tapered, natural-looking start; moderate maintenance.
- Knotless cornrows — no starter knot, so tension at the root is lower; moderate maintenance.
- Stitch/zigzag braids — graphic, geometric parting patterns that create a bold visual; moderate maintenance.
- Fulani braids — center part with a front braid, side braids, and beads or thread; moderate to higher maintenance.
- Jumbo/chunky cornrows — thick, fast-to-install rows; low maintenance, shorter wear time.
- Boho/bohemian cornrows — braids with intentional loose curls or wavy ends for a softer look; higher maintenance.
- Braided ponytail/updo — cornrows gathered into a high or low ponytail or crown; moderate maintenance.
Key Takeaways
Cornrows are one of the most versatile protective styles available, but the right choice of technique, tension, and maintenance routine is what separates a healthy, long-lasting style from one that causes damage.
| Point | Details |
|---|---|
| Match style to texture and face shape | Coily textures hold micro rows best; round faces benefit from high-ponytail updos that add length. |
| Prioritize low tension at the hairline | Request feed-in or knotless installation for front rows to reduce traction risk on fragile edges. |
| Use lightweight scalp oil every 2–3 days | Jojoba or grapeseed oil keeps the scalp moisturized without the buildup that heavy pomades cause. |
| Bring photos and name the technique | Say "feed-in," "knotless," or "stitch braids" — specific language prevents salon miscommunication. |
| Stylemycrown for pre-appointment preview | Use the AR virtual try-on to test braid size, parting, and accessories on your photo before booking. |
Table of Contents
- The most popular cornrow hairstyles women are choosing right now
- How to cornrow: basic steps and the feed-in method explained
- Extensions, weave options, and accessories: adding length without adding damage
- Prep, daily care, and realistic timelines for how long cornrows last
- Which cornrow styles flatter different face shapes and hair textures
- What to expect at a braiding appointment: time, cost, and what to bring
- How to tell your braider exactly what you want
- How virtual try-on can help you choose a cornrow look
- What a braider actually prioritizes, and what you should too
- See your cornrow look before you book
- Sources
The most popular cornrow hairstyles women are choosing right now
Cornrows are a low-manipulation protective style with roots that run deep in African cultural history. They can last for weeks with proper care, and the range of variations, from micro rows to graphic statement patterns, means there's a real fit for every texture and occasion. Current trends show both classic straight-backs and more graphic, architectural patterns gaining traction, according to editorial roundups from Thrivenaija.
Here's a closer look at the styles worth knowing.
1. Straight-back cornrows
Parallel rows braided from the front hairline straight to the nape. ChicSnips describes them as the "little black dress" of braiding: sleek, versatile, and low maintenance. They work as a standalone style or as a flat base for lace-front wigs and weaves. Braid thickness is adjustable, from fine micro rows to chunky sections, so the same basic pattern reads differently depending on size. Lasts for several weeks with care.
2. Micro cornrows
Very fine, closely spaced rows that mimic the look of a full scalp braid. The installation takes longer, but the payoff is a precise, almost painted-on pattern that holds detail beautifully. Best for coily and tightly coiled textures where the small sections stay defined. Wear time can stretch to 6–8 weeks, though scalp access for moisturizing requires more deliberate effort.
3. Diagonal and curved cornrows
Instead of straight rows, the braids angle across the head or curve into geometric shapes. This parting style adds movement and visual interest without changing the braiding technique. Works well on oval and heart-shaped faces because the diagonal line softens a strong jawline or balances a wider forehead. Moderate maintenance, similar wear time to classic straight-backs.
4. Feed-in/Ghana braids
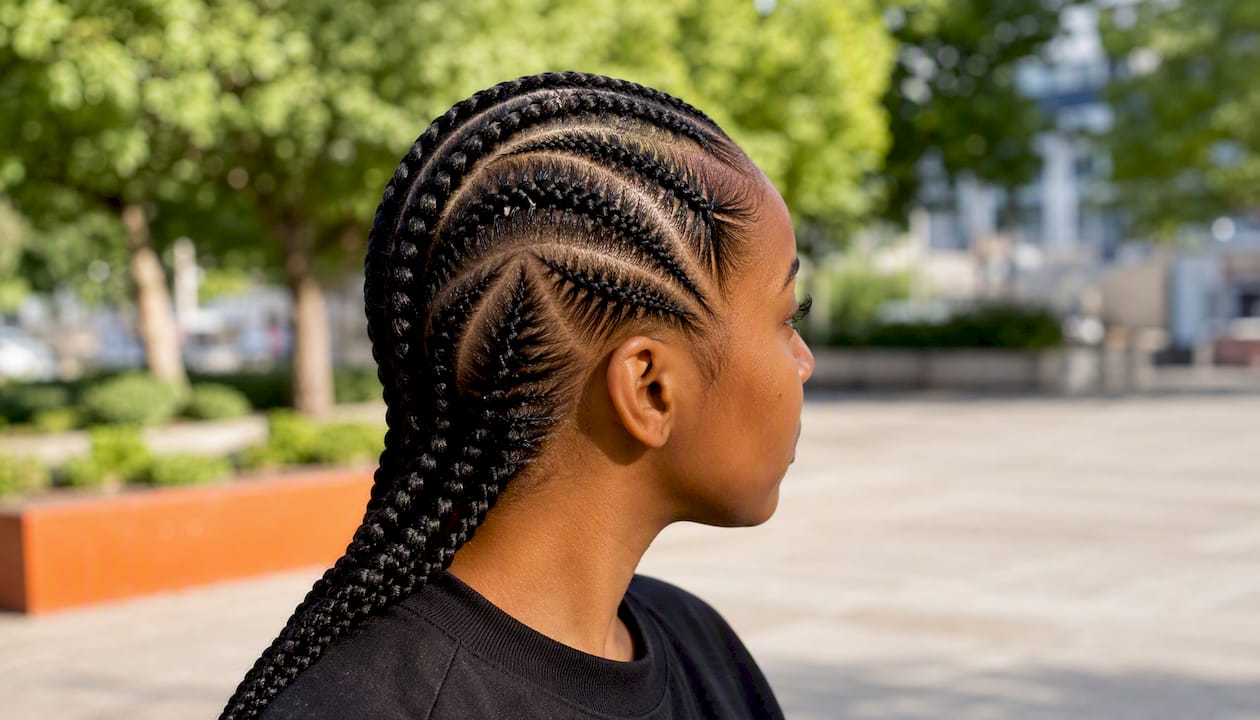
The feed-in method adds braiding hair gradually as the braid progresses, creating a tapered start at the hairline rather than a bulky knot at the root. The result looks natural and sits flatter against the scalp. Ghana braids are typically larger and bolder than standard cornrows, often styled in thick, dramatic rows. The tapered start also means less tension at the front hairline, which matters for anyone with fragile edges.
5. Knotless cornrows
Similar to feed-in but with no starter knot at all. The braid begins with your natural hair, and extension hair is fed in gradually. Because there's no knot pulling at the root, the tension is distributed more evenly across the braid. Knotless styles tend to feel lighter and more comfortable, especially in the first few days. A good pick for anyone who has experienced scalp soreness after traditional braiding.
6. Stitch braids
Stitch braids use a crochet needle or a specific parting technique to create horizontal "stitches" across the braid, giving each row a graphic, ladder-like appearance. The parting pattern can be straight, curved, or zigzag. Bold and architectural, they photograph well and work on a range of textures. The stitch detail does add some installation time, and the precise parting requires a skilled hand.
7. Fulani braids
A West African style characterized by a center part, a braid running along the center of the head, side braids, and accessories like gold cuffs, beads, or thread. The style carries significant cultural meaning and has been worn for centuries as a marker of identity in Fulani communities. Today it's one of the most recognized cornrow styles women request for both everyday wear and special occasions. Beads and cuffs are part of the look, but keep them lightweight to avoid tension on the ends.
8. Jumbo/chunky cornrows
Thick, widely spaced rows that install quickly (often 1–3 hours) and create a bold, graphic silhouette. Because the sections are large, there's less tension per strand, but the weight of the braid itself can pull on the root if extensions are very long. Best worn at a moderate length. Jumbo styles typically last 2–4 weeks before the new growth makes them look lifted at the root.
9. Boho/bohemian cornrows
Cornrows with intentionally loose, wavy, or curly ends, either from leaving natural hair out at the tips or using wavy braiding hair. The contrast between the tight, structured braid and the soft, free ends creates a relaxed, editorial look. Higher maintenance than fully braided styles because the loose ends need moisture and detangling. Works beautifully on curly and wavy textures where the natural ends blend seamlessly with the loose extension hair.
10. Braided ponytail and updo cornrows
All rows braid toward a single point, usually the crown or nape, where the ends are gathered into a ponytail, bun, or crown. The updo silhouette elongates the neck and works for both casual and formal settings. Tension at the ponytail base is a real concern here. Ask your stylist to keep the gathering point loose enough that you can slide a finger underneath without resistance.
11. Half-cornrow, half-down styles
The front and crown sections are braided in cornrows, while the back or sides are left loose or styled in twists and curls. This hybrid gives the protective benefit of cornrows where the hair is most exposed to manipulation (the front) while keeping volume and movement at the back. A strong choice for women who want the protective benefits without a fully braided look.
12. Cornrows with curls
Cornrows along the scalp with loose, defined curls or coils left out at the crown or sides. The braided sections keep the roots flat and protected while the curls add dimension. Works best on naturally curly textures where the loose sections hold their shape without much product. Requires more daily attention to keep the curls moisturized and defined.
How to cornrow: basic steps and the feed-in method explained
The core of a cornrow is a three-strand underhand braid that picks up small sections of scalp hair as it moves along a parted row. Here's how the process works, whether you're following along at a salon or attempting a basic style at home.
What you'll need: a rat-tail comb for parting, edge control, leave-in conditioner, and braiding hair if you're adding extensions, as recommended by Blavity's straight-back braids guide.
- Wash and condition. Start with clean, detangled hair. Apply a leave-in conditioner and let it absorb before braiding. Braiding over product buildup shortens wear time and stresses the scalp.
- Part the first row. Use a rat-tail comb to draw a clean, straight line from the front hairline to the nape. The width of this section determines the braid's thickness.
- Divide the section into three strands. Hold two strands in one hand and one in the other.
- Begin the underhand braid. Cross the right strand under the center strand, then the left strand under the new center. This underhand motion is what keeps the braid flat against the scalp.
- Pick up scalp hair. With each stitch, add a thin slice of hair from the scalp to the outer strand before crossing it under. This is what makes it a cornrow rather than a free-hanging braid.
- Continue to the nape. Keep tension even and consistent. If the braid feels tight enough to pull the skin, loosen your grip.
- Secure the end. Wrap a small elastic or rubber band around the tip. For extensions, the braiding hair holds the end naturally.
- Repeat for each row. Part the next section parallel to the first and repeat.
The feed-in method
Beautycon explains that the feed-in method adds braiding hair in small increments as the braid progresses, rather than attaching a full bundle at the root. The braid starts thin at the hairline using only your natural hair, then gradually thickens as extension hair is fed in. The result is a tapered, natural-looking start that sits flat and puts far less tension on the hairline than a traditional knot attachment.
For anyone with fine edges or a history of traction sensitivity, feed-in is worth requesting specifically. It's a technique that requires practice, so a professional installation is safer than a DIY attempt for the front rows.
Pro Tip: Test tension early. After the first two or three stitches of a new row, press your fingertip against the scalp near the braid. If the skin moves with the braid or you feel a pulling sensation, the tension is too high. Ask your stylist to loosen the section immediately, before the braid is too far along to redo.
Extensions, weave options, and accessories: adding length without adding damage
Extensions open up a lot of creative territory, but the choices you make here directly affect your hair's health over the next several weeks.
Synthetic vs. human hair extensions
Synthetic braiding hair (kanekalon is the most common type) is affordable, widely available, and comes in a huge range of colors. It holds a style well and doesn't require heat styling. The trade-off is weight: synthetic hair can be heavier than it looks, especially in longer lengths. Human hair extensions are lighter, feel more natural, and can be heat styled, but they cost significantly more and require more maintenance to keep from drying out.
For most cornrow styles, synthetic kanekalon is the practical choice. For boho styles where the ends need to look and move like natural hair, a blend or human hair extension reads more authentically.
Accessories: beads, cuffs, shells, and thread
Accessories are part of the visual language of cornrows, especially in Fulani and stitch styles. Small metallic cuffs, a few wooden or acrylic beads, and thread wraps add personality without significant weight. The problem starts when accessories become numerous or heavy. Good Housekeeping notes that heavy accessories can add meaningful weight to braids and that excessive tension during installation can contribute to thinning or traction-related damage over time.
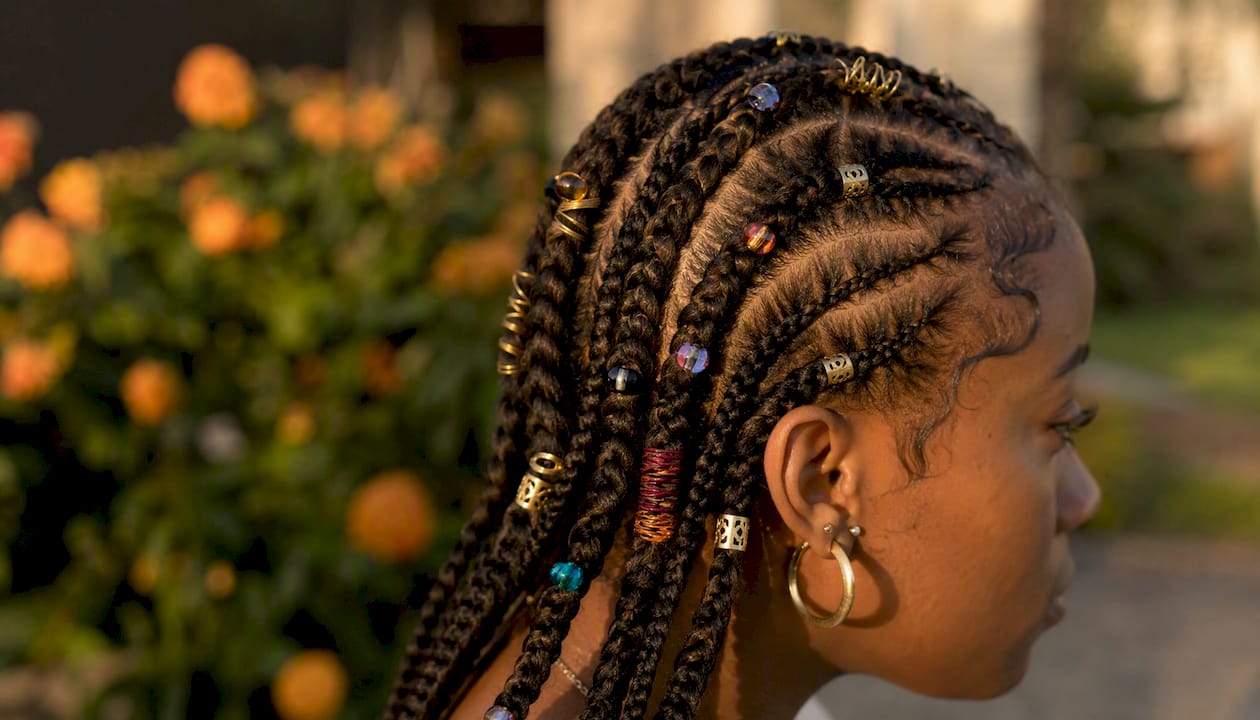
A practical rule: keep beads and cuffs to the middle and lower sections of the braid rather than clustering them near the root. Avoid large, heavy shells or metal cuffs on styles you plan to wear for more than two weeks.
Pro Tip: If you love the look of beads, choose lightweight acrylic or wooden options over metal. They give you the same visual effect at a fraction of the weight, and your ends will thank you at removal.
When to ask for feed-in or knotless techniques
If your stylist typically starts with a knot at the root, ask specifically for feed-in or knotless installation on the front rows. The hairline is the most vulnerable area for traction damage, and the tapered start of a feed-in braid distributes tension far more evenly than a heavy starter knot.
Prep, daily care, and realistic timelines for how long cornrows last
Cornrows are not a "set it and forget it" style. The protective benefit only holds if the scalp stays healthy during the wear period.
Before your appointment
Wash your hair thoroughly and deep-condition at least 24 hours before your appointment. Arrive with detangled, fully dry hair. Braiding over wet or damp hair can cause mildew and weakens the braid's hold. If you're adding extensions, your stylist may prefer to prep the braiding hair themselves, but confirm beforehand.
Daily and weekly care
The scalp still needs moisture even when it's braided. Apply a lightweight oil (jojoba, grapeseed, or a diluted tea tree blend for scalp health) directly to the scalp every 2–3 days. Byrdie recommends active scalp care throughout the wear period, including gentle cleansing to prevent dryness, product buildup, and itching. Avoid heavy pomades that sit on the braid surface and are difficult to remove without disrupting the style.
For cleansing, a diluted shampoo applied with a spray bottle and worked gently along the scalp works well. Follow with a lightweight leave-in or scalp spray. Edge control is useful for smoothing the hairline, but apply it sparingly and choose a formula that doesn't flake or harden.
How long different styles last
| Style | Typical Wear Time | Key Maintenance Note |
|---|---|---|
| Micro cornrows | 6–8 weeks | Scalp access is limited; use a spray applicator for oil |
| Classic straight-backs | 4–6 weeks | Easiest to cleanse; good for first-time wearers |
| Feed-in/Ghana braids | 4–6 weeks | Monitor hairline tension weekly |
| Jumbo/chunky cornrows | 2–4 weeks | New growth lifts roots faster; remove before 4 weeks |
| Boho/bohemian cornrows | 2–3 weeks | Loose ends need daily moisture and detangling |
| Braided updo/ponytail | 3–5 weeks | Check ponytail base tension every few days |
Red flags that mean remove now
Persistent pain or soreness beyond the first 48 hours, numbness or tingling at the scalp, visible thinning or gaps at the hairline, and pimples or bumps along the part lines are all signals to remove the style immediately. Waiting it out risks traction alopecia, which can take months to reverse.
Which cornrow styles flatter different face shapes and hair textures
The right cornrow silhouette can highlight your best features. The wrong one can visually widen or shorten the face in ways that feel off. Here's how to match the style to your proportions.
By face shape
Oval: The most flexible shape. Virtually any cornrow style works, from tight micro rows to wide jumbo braids. Use this as an opportunity to experiment with graphic stitch patterns or bold diagonal rows.
Round: Styles that add height and length work best. Straight-back cornrows gathered into a high ponytail or updo elongate the face. Avoid very wide, flat styles that emphasize width across the cheekbones.
Heart: A center part with braids that angle slightly outward (like Fulani braids) balances a wider forehead against a narrower chin. Side-swept or diagonal rows also soften the forehead's width.
Square: Curved or diagonal cornrows soften a strong jawline. Boho styles with loose ends add softness at the perimeter. Avoid very blunt, straight-across patterns that mirror the jaw's angularity.
By hair texture
Coily and tightly coiled textures hold cornrows the longest and give the cleanest braid definition. Smaller sections stay crisp for weeks. Curly textures (looser coils) braid well but may show new growth and frizz sooner, especially at the hairline. Wavy textures can be cornrowed, but the braid may feel less secure without a light holding product worked through the hair before braiding.
Braid size matters here too. On coily hair, micro cornrows look precise and intentional. On wavy hair, larger sections tend to hold better and look cleaner over time.
Edge styling
Baby hairs can be laid with a soft-bristle brush and a small amount of edge control for a polished finish. Use this sparingly. Repeated, heavy application of edge control on fine or fragile edges adds stress to an already vulnerable area. On thicker edges, a light gel or edge control applied once after installation is usually enough to last several days.
What to expect at a braiding appointment: time, cost, and what to bring
Walking into a braiding appointment without a plan wastes time and increases the chance of a miscommunication. Here's what to know before you sit down.
Time expectations
| Style | Estimated Appointment Time |
|---|---|
| Jumbo cornrows (6–8 rows) | 1–3 hours |
| Classic straight-backs (medium) | 2–4 hours |
| Feed-in/Ghana braids | 3–5 hours |
| Micro cornrows | 6–10 hours |
| Braided updo or ponytail | 2–4 hours |
Time varies based on your hair's length and density, the stylist's speed, and whether extensions are being added. Book a longer slot than you think you need.
Typical U.S. cost ranges
Prices vary significantly by city, stylist experience, and style complexity. As a general reference: jumbo cornrows typically run $60–$120, classic straight-backs $80–$150, feed-in styles $100–$200, and micro cornrows $150–$300 or more. Intricate parting patterns, accessories, and longer extension hair push costs up. Always confirm pricing before your appointment, as local rates differ widely.
What to bring
- Reference photos (at least two angles: front and back)
- The name of the technique you want (feed-in, knotless, stitch)
- Your preferred braid thickness (micro, medium, jumbo)
- Any braiding hair you've purchased, if your stylist doesn't supply it
- A snack and headphones for longer appointments
Questions to ask your stylist
- "Do you use the feed-in method for the front rows?"
- "How much tension will you use on my edges?"
- "Can you show me the parting pattern before you start?"
- "How long do you recommend I keep this style in?"
These questions signal that you know what you want and that scalp health matters to you. A good stylist will welcome them.
How to tell your braider exactly what you want
Miscommunication at the salon is one of the most common reasons women leave unhappy. Short, specific phrases and clear reference images solve most of it.
Phrases that work
Use these as a starting point when describing your desired style:
- "Straight-back medium cornrows, no extensions"
- "Feed-in jumbo cornrows, low ponytail"
- "Stitch cornrows with small beads, medium thickness"
- "Knotless cornrows, diagonal pattern, shoulder length"
- "Fulani braids with gold cuffs, center part"
- "Boho cornrows with wavy ends, no accessories"
Short, specific, and technique-named. That's the goal.
Image tips
Bring photos that show the parting from the top (a bird's-eye view of the scalp), the front hairline, and the full back of the head. If you want a specific braid thickness, find a photo where the size is obvious relative to the model's head. Mark the photo with a note if needed ("I want this thickness, not this length").
Terminology to use and avoid
Say "feed-in" instead of "add hair with a knot." Say "knotless" instead of "no knot at the root." Say "stitch braids" instead of "the ones with the lines across." Vague descriptions like "just braids" or "something neat" leave too much to interpretation. The more specific your language, the closer the result will be to what you pictured.
How virtual try-on can help you choose a cornrow look
Choosing a cornrow style from a flat photo on a phone screen is a guess. You can't see how the braid scale reads against your face, whether a center part suits your hairline, or how accessories will sit. That's the gap virtual try-on technology addresses.
Here's what a quality virtual try-on shows you:
- Parting direction and scale — how straight-back rows versus diagonal rows read against your actual face shape
- Braid thickness — the visual difference between micro, medium, and jumbo on your proportions
- Accessory placement — where beads or cuffs sit along the braid and how much visual weight they add
- Overall silhouette — whether a high ponytail updo or a flat, close-to-scalp style suits your features
What it doesn't replicate perfectly: the texture movement of real braiding hair and the way your natural edges lay. Think of it as a high-confidence preview, not a pixel-perfect guarantee.
The practical workflow looks like this: browse a style catalog to build a moodboard, use virtual try-on to test your top two or three choices on your own photo, save the results, and bring those images to your stylist consultation. You walk in with a clear visual reference instead of a vague idea.
Stylemycrown offers an AR virtual try-on catalog built specifically for Black hair, with over 528 curated styles including cornrow variations across braid sizes, parting patterns, and accessory options. You can preview looks on your own photo before committing to a single appointment. The style catalog is a strong starting point for building that moodboard.
What a braider actually prioritizes, and what you should too
Scalp comfort and long-term hair health. Those are the two things that matter most at every appointment, and they're also the two things most clients don't think to ask about until something goes wrong.
Here are three things worth knowing before you sit in the chair.
Test tension in the first row. The tension set in the first braid is the template for the whole head. If it feels tight after the first two stitches, say something immediately. Stylists can adjust. What they can't do is undo six rows of over-tight braids without starting over.
Request feed-in for the front rows specifically. Even if you want a traditional knot-start for the rest of the head, the hairline is where traction damage shows up first. A tapered feed-in start at the front costs nothing extra to ask for and protects the most visible and vulnerable section of your hair.
Shorter wear time with heavy accessories. If your style includes large beads, shells, or multiple cuffs, plan to remove it at the earlier end of the wear window. The weight accumulates over time, and the ends bear most of it.
One situation that should always end a service: sharp, stinging pain at the scalp during installation, or visible edge separation where the skin near the hairline looks pulled or lifted. That's not normal tightness. That's a signal to stop the service, remove the braid, and let the scalp recover before rescheduling.
See your cornrow look before you book
Picking a cornrow style is a real commitment. The appointment takes hours, the style stays for weeks, and a mismatch between what you pictured and what you got is genuinely frustrating. That's exactly why we built Stylemycrown.
Stylemycrown's AR virtual try-on lets you place over 528 curated hairstyles, including straight-backs, feed-in braids, stitch cornrows, Fulani styles, and updo variations, directly onto your photo. You see how the braid scale reads against your face, how accessories sit, and which parting direction actually flatters you, all before you book a single appointment. Try multiple looks, save your favorites, and walk into your stylist consultation with images that say exactly what you want.
Start with 10 complimentary credits, no subscription required to begin. Browse the style catalog to find your look, or go straight to Stylemycrown to try it on your photo now.
Sources
- 35 Best Cornrow Hairstyles 2024 - Natural Cornrow and Scalp Braids for Women — Good Housekeeping
- Straight Back Natural Hair Cornrows: A Complete Guide - ChicSnips
- 3 Ways To Style Straight-Back, Large Cornrows — Beautycon
- 50 Stunning Cornrow Hairstyles to Show Your Stylist — Byrdie
- Everything to Know About Straight Back Braids - Blavity
- Cornrows natural hair ideas you'll love — Thrivenaija